Sharing Local Files with the Remote Desktop
To move a local file to your Diamond Desktop, you will need to be familiar with the copy and paste mechanism common to Windows file management. Furthermore, you will need to enable this option when you log in as it is disable by default.
Sharing files when accessing your desktop via the Web
During the login process, you are asked for your username and password. Printer sharing is enabled by default, but in order to allow local disk access you will need to specifically tick the "share local disk drives and resources" option:
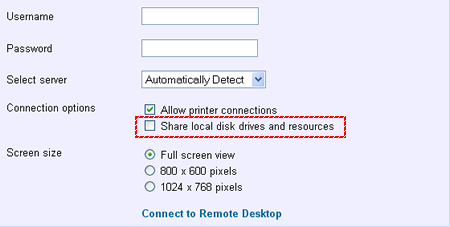
Once all fields are completed and the sharing option is selected, click "Connect to Remote Desktop". A warning dialogue will appear, which is OK to accept and continue:
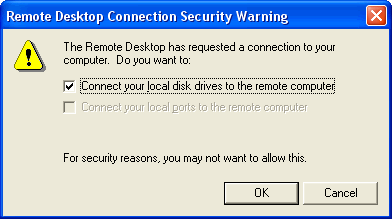
Once logged in, viewing the disks of your local PC from the Diamond Desktop is possible.
Note: It is not possible to share local drives with the online system if you use the "Quick Remote Desktop Login" option. If this function is required, the main login form should be used.
Sharing files when using Microsoft's RDP Client
When launching Windows RDP Client, disk drive sharing is disabled by default. Before logging on to the Diamond Desktop, select 'Options' and the there is a specific tab for 'Local Resources':
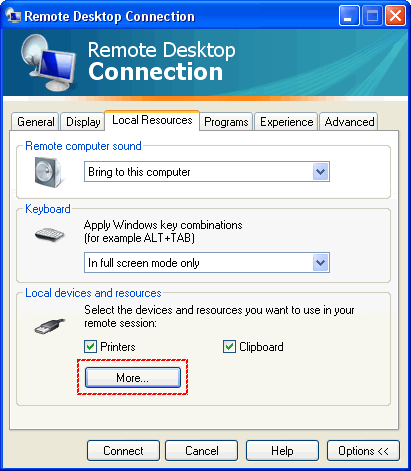
Depending on your version of Remote Desktop Connection, you may need to select 'More' to actually view the drives to make available to the online system. If this is the case, you will see a list of available local drives and shared drives on your own network. Simply select which of these you wish to have available.
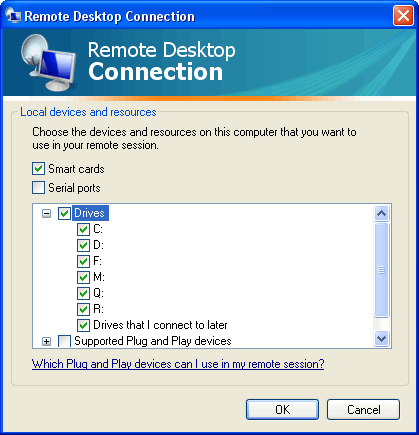
In this instance, drives C and D are the hard disk and CDROM, F is a USB memory key and M, Q and R are network shares which may be to other PCs or servers on your local network.
Once the drives are selected, click 'OK' to return to the options where the connection can be made. Depending on other settings, the option to allow access to local drives may apply to other RDP connections you use.
How to move files:
To move files between your local PC and the Diamond Desktop use Windows Explorer, which is available on all Diamond Online Accounts. This is started using the Start Menu; the shortcut keys (Windows+E) will only work when working full screen.
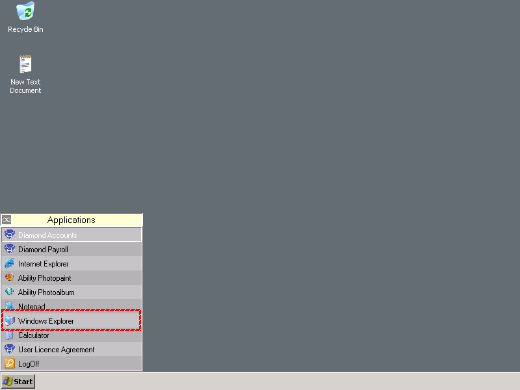
Once started, you will have a limited selection of drives due to the security restrictions in place within Diamond Online. Click "My Computer" to see all shared devices available, which should include the local disks:
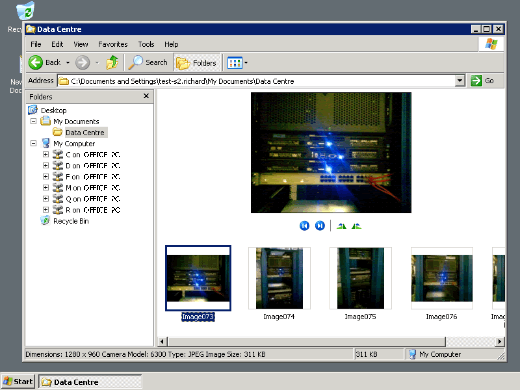
To move files between the remote desktop and your local PC, simply drag them to the new location. Alternatively, use the copy and paste functions in exactly the same manner as if you were only working on your local PC.
It is important to note that it can take a while to move files, due to the speed restrictions of your Internet connection. A dialogue box, containing an estimated time, will normally be desplayed and the transfer can be cancelled if it is likely to take too long.
Further help is available by reviewing the help for Windows Explorer on your local Windows PC as the principles are the same in the server based environment.
